

Develop & Publish Your Own Android Library

“Android was intended to be very customizable. And we welcome innovations.” – Sundar Pichai
A few days ago, we launched an Android library called Face SDK, which allows developers to detect a person’s face with liveness detections, i.e. smile, blink, etc. with few lines of code.
In addition to JAR files, the Android also makes use of a binary distribution format called Android ARchive (AAR). The .aar bundle is nothing but the binary distribution of an Android Library Project.
An AAR is similar to a JAR file, but it can contain both resources and compiled byte-code. An AAR file can be included in the build process of an Android app similar to a JAR file.
As we all are familiar, in Android Studio, if you wish to include any library, for example, SmilePass Face SDK, you can do it by adding following lines to build.gradle file-
dependencies {

implementation 'com.smilepass.mobilesdk:facesdk:1.0.0'

}
Have you ever wondered how does gradle pull library from the repository? Basically, we need to know that a gradle dependency string consists of three parts-
dependencies {

implementation 'GROUP_ID:ARTIFACT_ID:VERSION'

}
In the above example, GROUP_ID is com.smilepass.mobilesdk, ARTIFACT_ID is facesdk and VERSION is 1.0.0.
GROUP_ID- It defines the name of the library group. It is possible that multiple libraries which perform the job of the same context can belong to the same GROUP_ID. For example, the Android support library has the same GROUP_ID com.android.support for multiple support libraries. Here is the example-
dependencies {

implementation 'com.android.support:design:' + supportLibVersion

implementation 'com.android.support:appcompat-v7:' + supportLibVersion

implementation 'com.android.support:recyclerview-v7:' + supportLibVersion

implementation 'com.android.support:support-v4:' + supportLibVersion

implementation 'com.android.support:exifinterface:' + supportLibVersion

}
When you add a gradle dependency to the build.gradle file and sync the project, Gradle will ask maven repository if corresponding AAR and other files exist. For example, for the gradle dependency com.smilepass.mobilesdk:facesdk:1.0.0, you could find its library files from-
http://jcenter.bintray.com/com/smilepass/mobilesdk/facesdk/0.0.5-alpha
Then Android Studio downloads those files to our machine and compiles the project. Now you can access functionalities of this SDK in your project.
Know an AAR File Format
AAR file is developed on top of a JAR file. It was invented because JAR file cannot contain Android specific files i.e. resources, manifest, assets, JNI etc. An AAR file contains all these things and it is a normal compressed file like JAR. It contains JAR file inside it with the classes.jar name. The structure of the AAR file is as follows-
- /AndroidManifest.xml (mandatory)

- /classes.jar (mandatory)

- /res/ (mandatory)

- /R.txt (mandatory)

- /assets/ (optional)

- /libs/*.jar (optional)

- /jni/<abi>/*.so (optional)

- /proguard.txt (optional)

- /lint.jar (optional)
Develop & Publish Your Own SDK
When you get a chance to develop your own SDK for the first time, few questions are likely to come in your mind-
- What are the best practices to structure and develop an SDK?
- How to obfuscate SDK, how is it different from normal application projects?
- Where and how to publish SDK to create its Gradle dependency?
- How to provide tutorials and sample apps to developers for the integration guide?
So that’s all? Are these questions enough to get started?
The answer is – NO.
You might not realize, but each question is the root of other sub-questions. When you dive in the ocean of these questions, you will feel many things coming towards you. To float your boat well, we have summarized these questions in this tutorial.
Development & Architecture
Create a new Android library project with the following steps in Android Studio-
- Create a new Android project or use an existing project to create a library module. To create a new module, go to the File -> New -> New Module
You will see the following dialog-
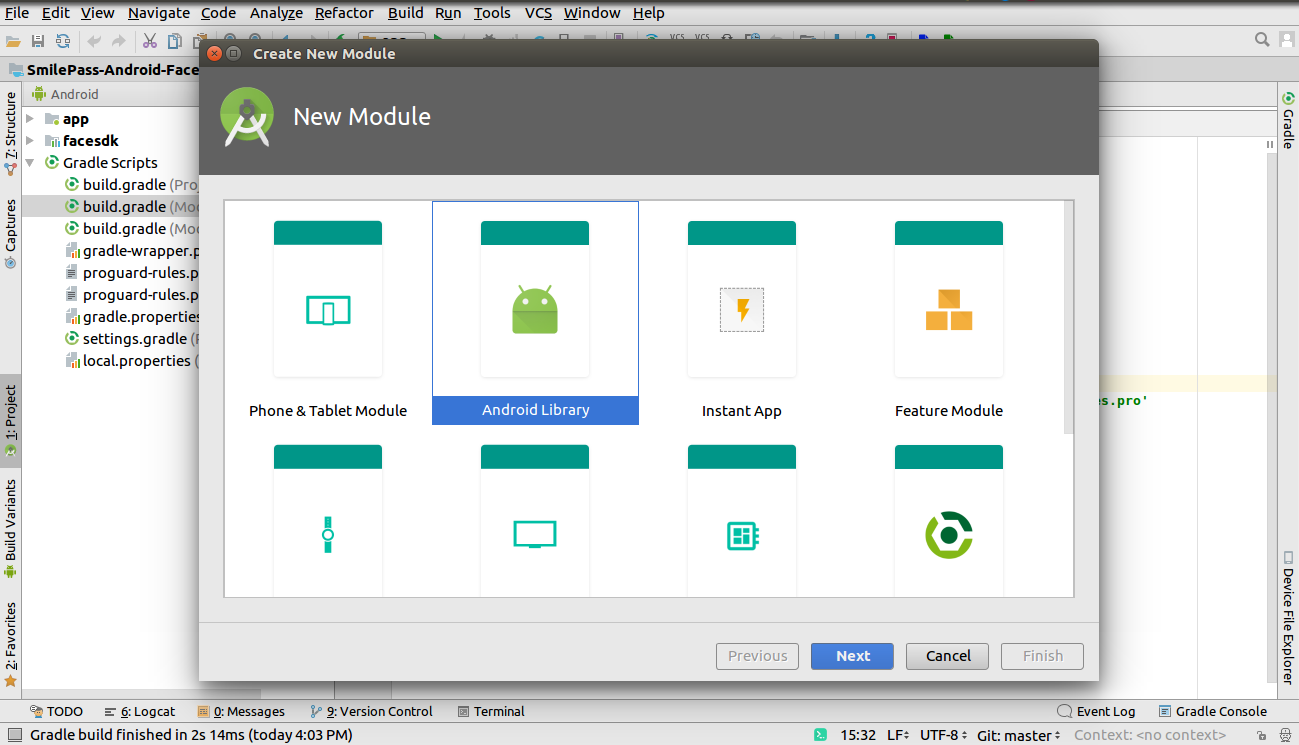
Select Android Library and click Next.
- After clicking the Next button, you need to configure your library module-
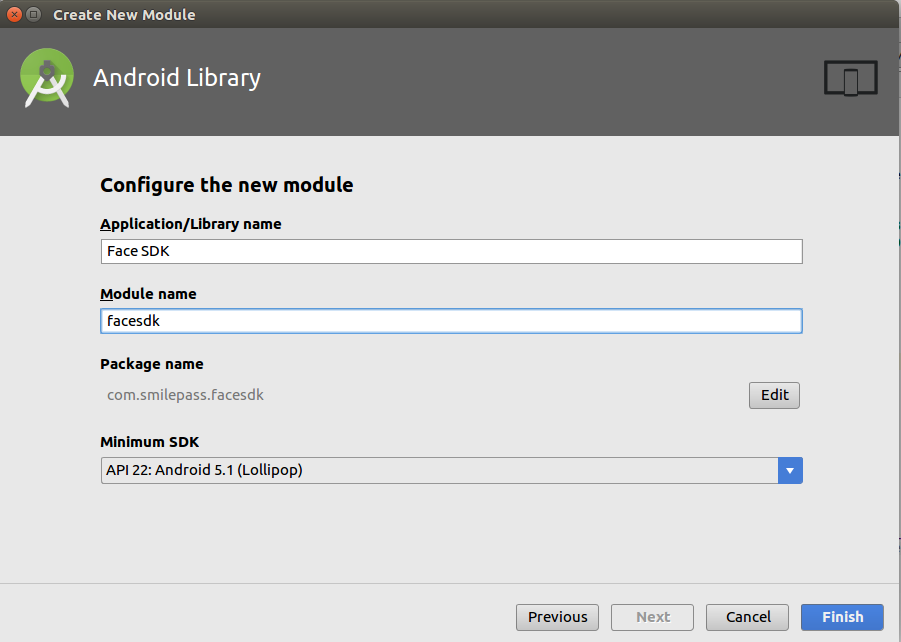
Enter library name, module name, and package name. Select minimum SDK version supported and click on Finish. You will see newly created module added in the project.
- Add following line in your app level build.gradle-
implementation project(':facesdk')
Replace “facesdk” with your module name.
There are a number of architectures for building an Android application i.e. MVP, MVVM etc. But when you don’t have any view, choosing these architectures would not be a good idea.
Some libraries contain UI elements i.e. Google Maps; sometimes your library is the abstraction of REST APIs i.e. Microsoft Cognitive SDK; sometimes you are providing widgets to prettify user’s applications i.e. Android Support Libraries.
One more challenge while development is taking API Key from the user and notify the user if it is a correct. Google takes API key in Manifest, whereas Microsoft Cognitive SDK takes it in the constructor of its REST client.
To be precise, the decision of good architecture, API key management, exception handling will depend on your requirements.
An example of the package structure for REST API calling SDK is as follows-
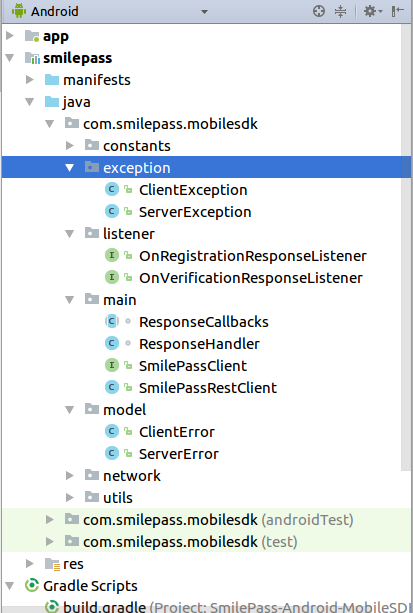
SmilePassRestClient is the main class which contains feature methods i.e. register(). Create listeners and exceptions to provided parsed result to user.
Obfuscation
Proguard is used to shrink, obfuscate, optimize code. Proguard is necessary for your library to remove unused code and make reverse engineering little difficult.
Proguard rules for the library are different from the normal applications. As you know, Proguard renames classes, variables, and methods using meaningless names. You would like to keep the names of those methods and classes as it is that developers will call. You will need to test and verify obfuscated code from generated AAR file.
In your project explorer, you will see two proguard files, one for the “app” module and another for the new library module you created now (in our case, it’s “facesdk”)-
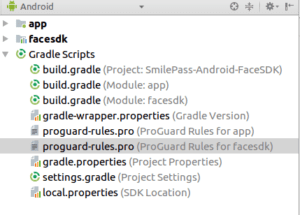
Copy and paste the content of this Proguard File which has library specific proguard rules.
Finally set minifyEnabled true in library’s gradle file under buildTypes.
Publish SDK
There are plenty of platforms for hosting your Android library and create its gradle or maven dependency. You can choose over JitPack or JCenter or Maven Central.
We prefer JCenter and we are going to teach how to publish your library in JCenter.
Why JCenter?
You must have seen these lines in root level build.gradle file in an Android Project-
repositories {

jcenter()

}
The advantage of choosing jCenter over others is, any new project in Android Studio by default includes jCenter, so the developers using your library won’t have to add any additional configuration except gradle dependency with implementation line in app level build.gradle file.
Second thing is, jCenter is the largest Java repository on the planet. It is the superset of maven central. It means, whatever available in maven central is already available in jCenter.
The third advantage is, it is pretty easy to upload your own library to Bintray. There is no requirement to sign them or do demanding things like you have to on Maven Central.
Create an Account on JFrog Bintray
Since jCenter is hosted on JFrog Bintray, create a new account on it by clicking on sign up.
You can sign up using GitHub, Twitter, Google or by directly entering your email ID and other details. Create an organization for which you are going to create the library. Once you finish sign up and create an organization, log in to your account and select organization, you will see following dashboard-
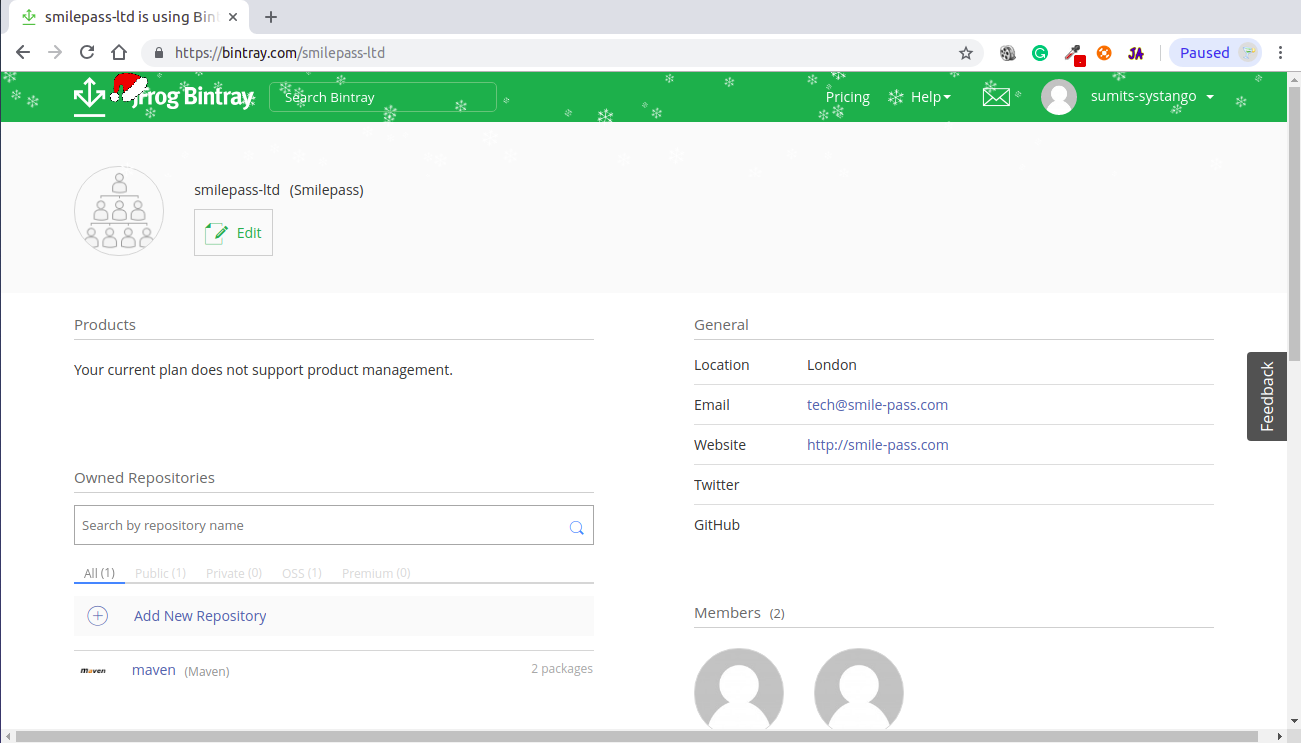
You will see organization name at the top, repositories (we will create it in the next step) and other details you have filled.
Create a New Repository
The next step is creating a repository. Click on “Add New Repository” button on the profile dashboard, you will see the following form-
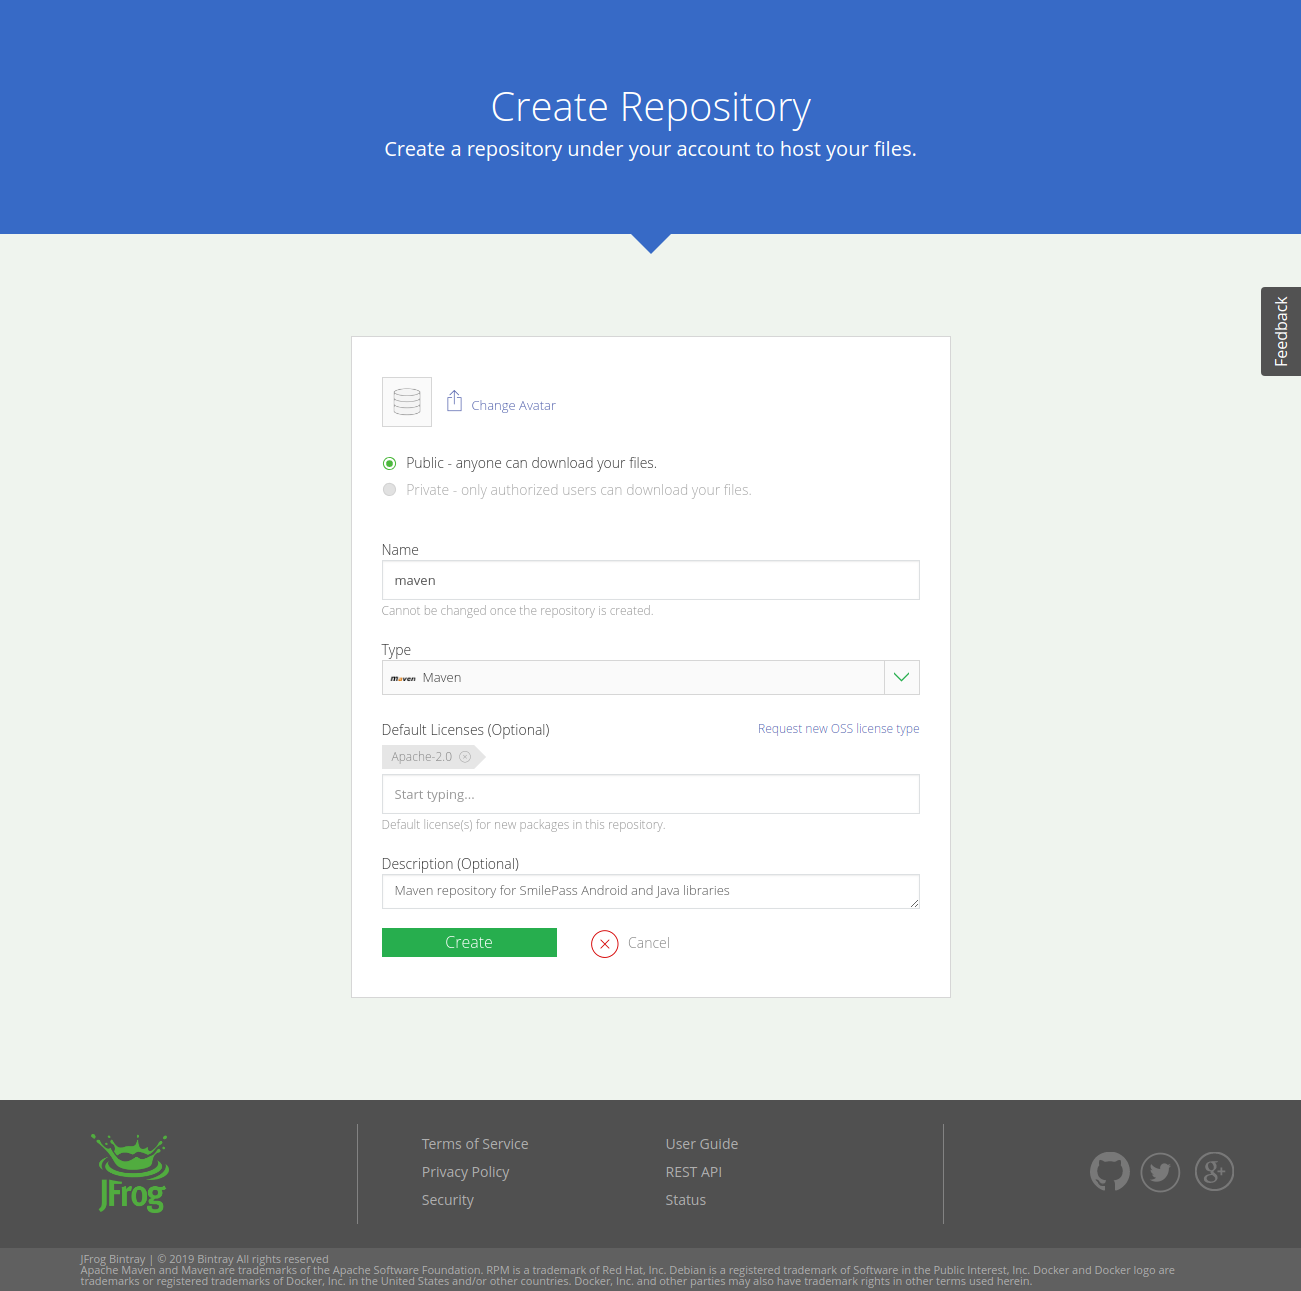
You can provide any name for your repository but we recommend “maven”, as it describes that it is a maven repository for all your Android and Java libraries. Select “Maven” in type. Provide license, description, and select avatar.
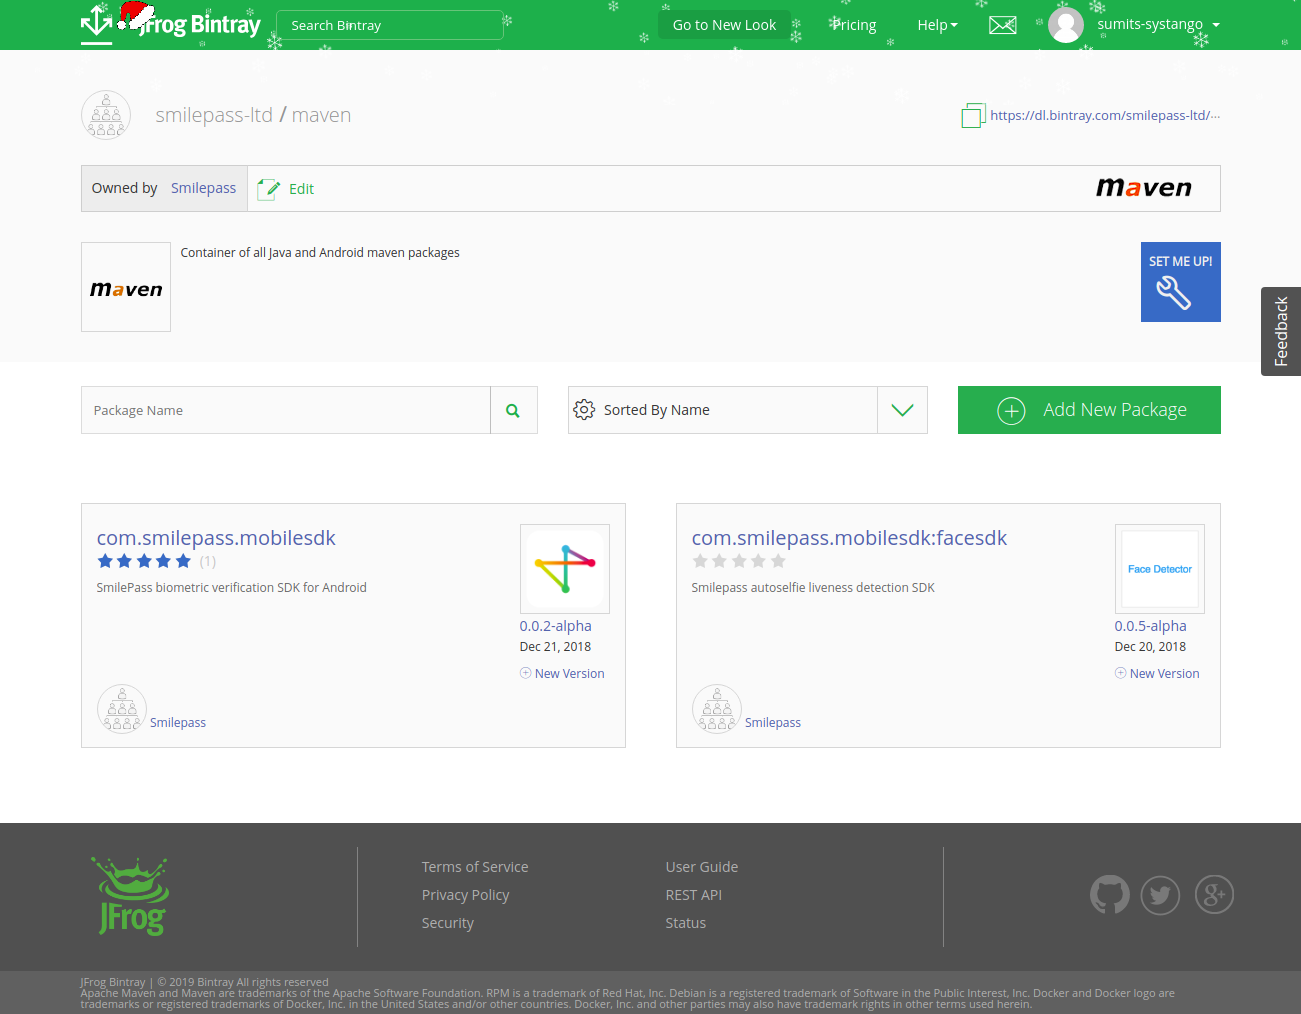
Once created, you will be redirected to the profile dashboard. You can see your new repository name in the Owned Repositories list section. Click on the repository title there and you will be directed to the following repository page-
Add a New Package
The next step is creating a package. Package in the Bintray is created for every module project. If you have multiple modules in your project, you need to create separate packages for them. Click on the “Add New Package” button on the repository page and you will get the following form-
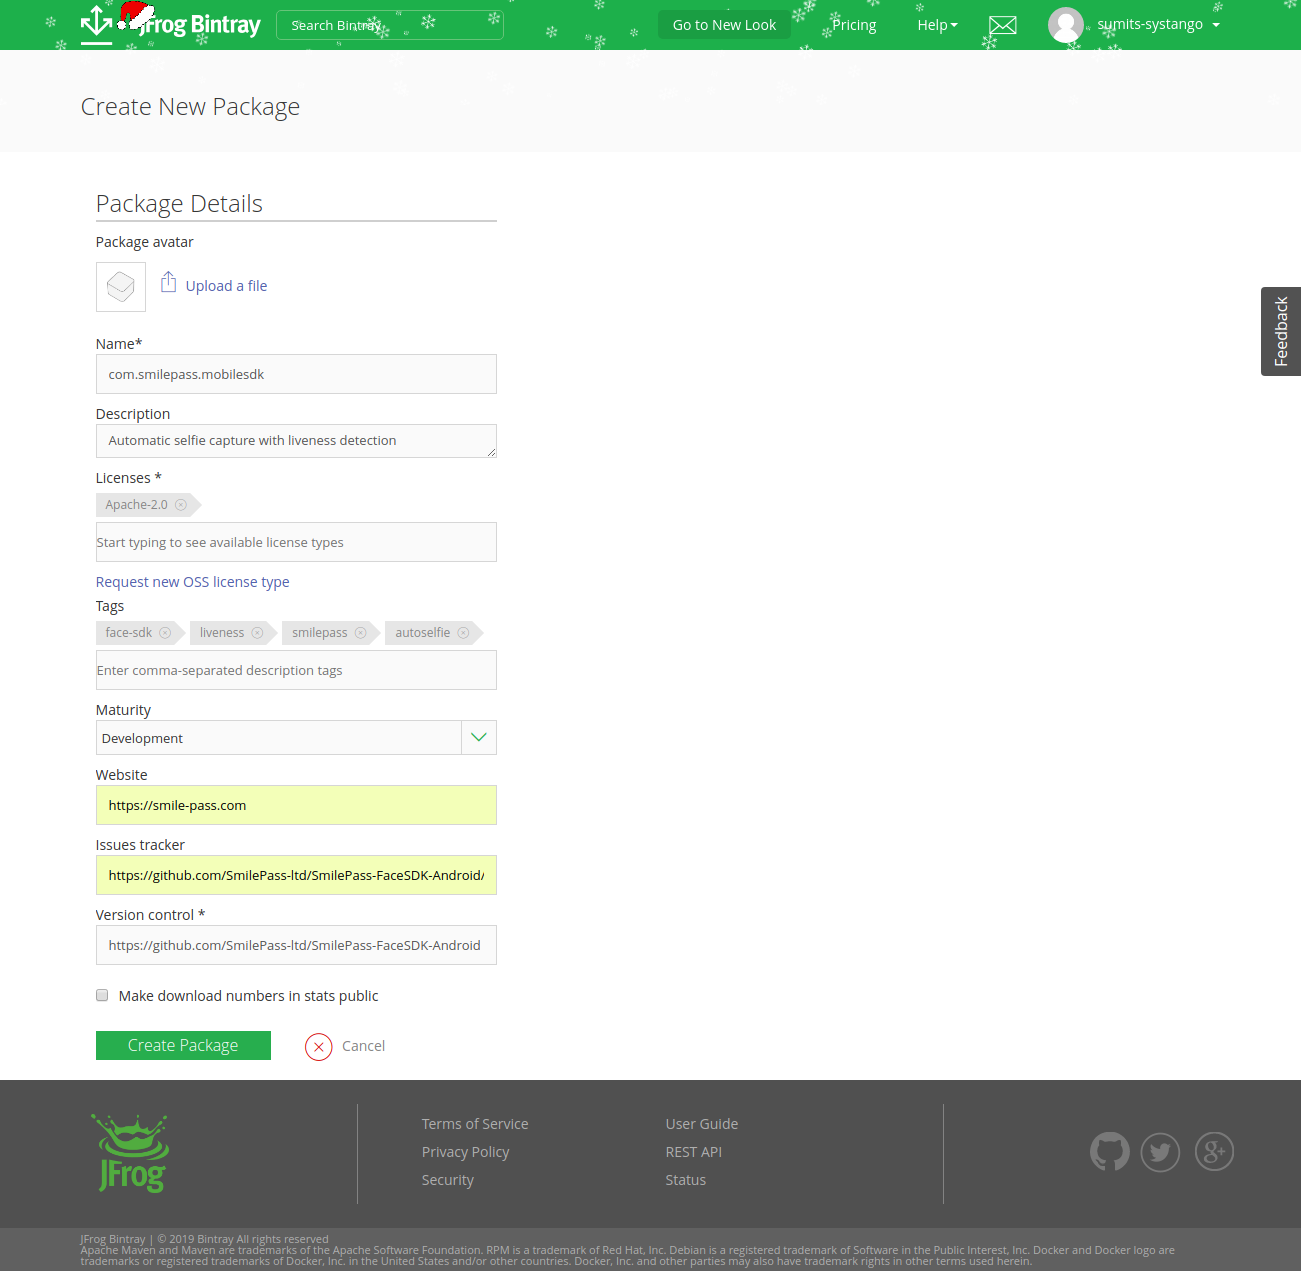
The package name is generally your project’s package i.e. com.smilepass.mobilesdk.
If you have multiple projects under the same group id, you can add your artifact id in package name for the ease of understanding i.e. com.smilepass.mobilesdk:facesdk.
If you have private GIT repo for the library project, you can provide the link of the public sample app GitHub repository. Fill all the details and go to the package page. You will see package page as follows-

Create a New Version
Every time you create a new version of your library, you will need to create the version of the version from Bintray dashboard also. Click on “New Version” and you will see a small form as follows-
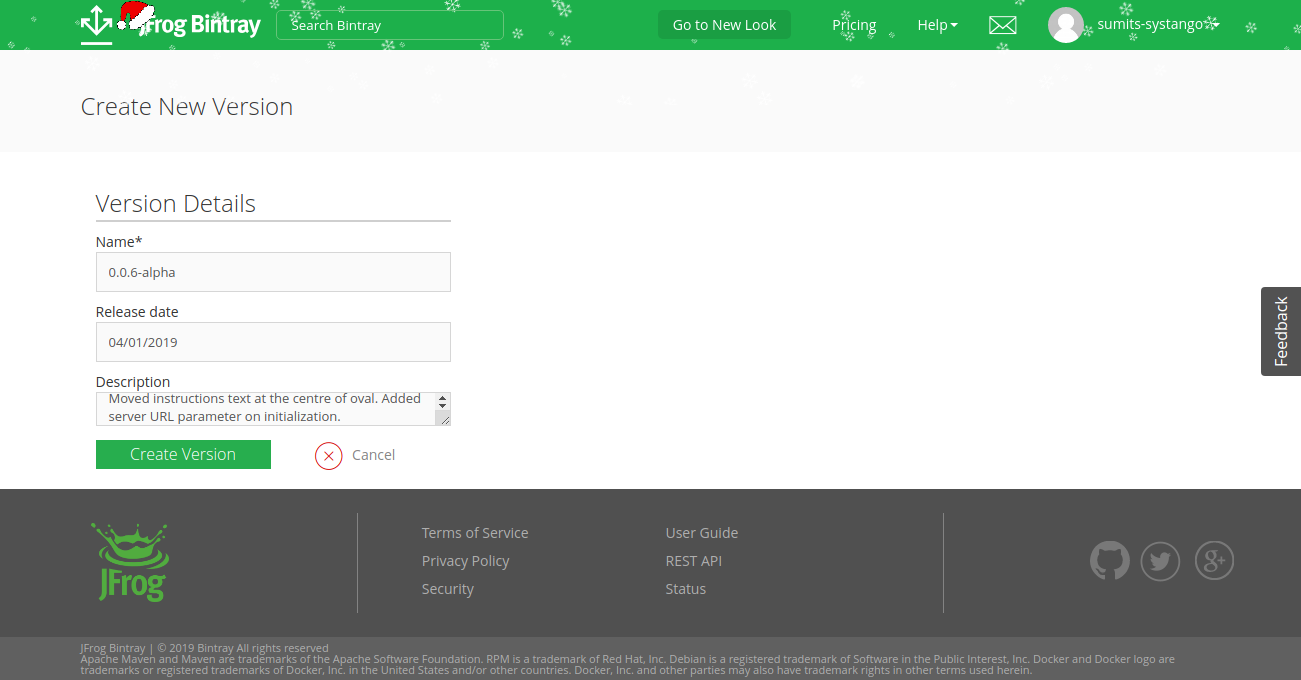
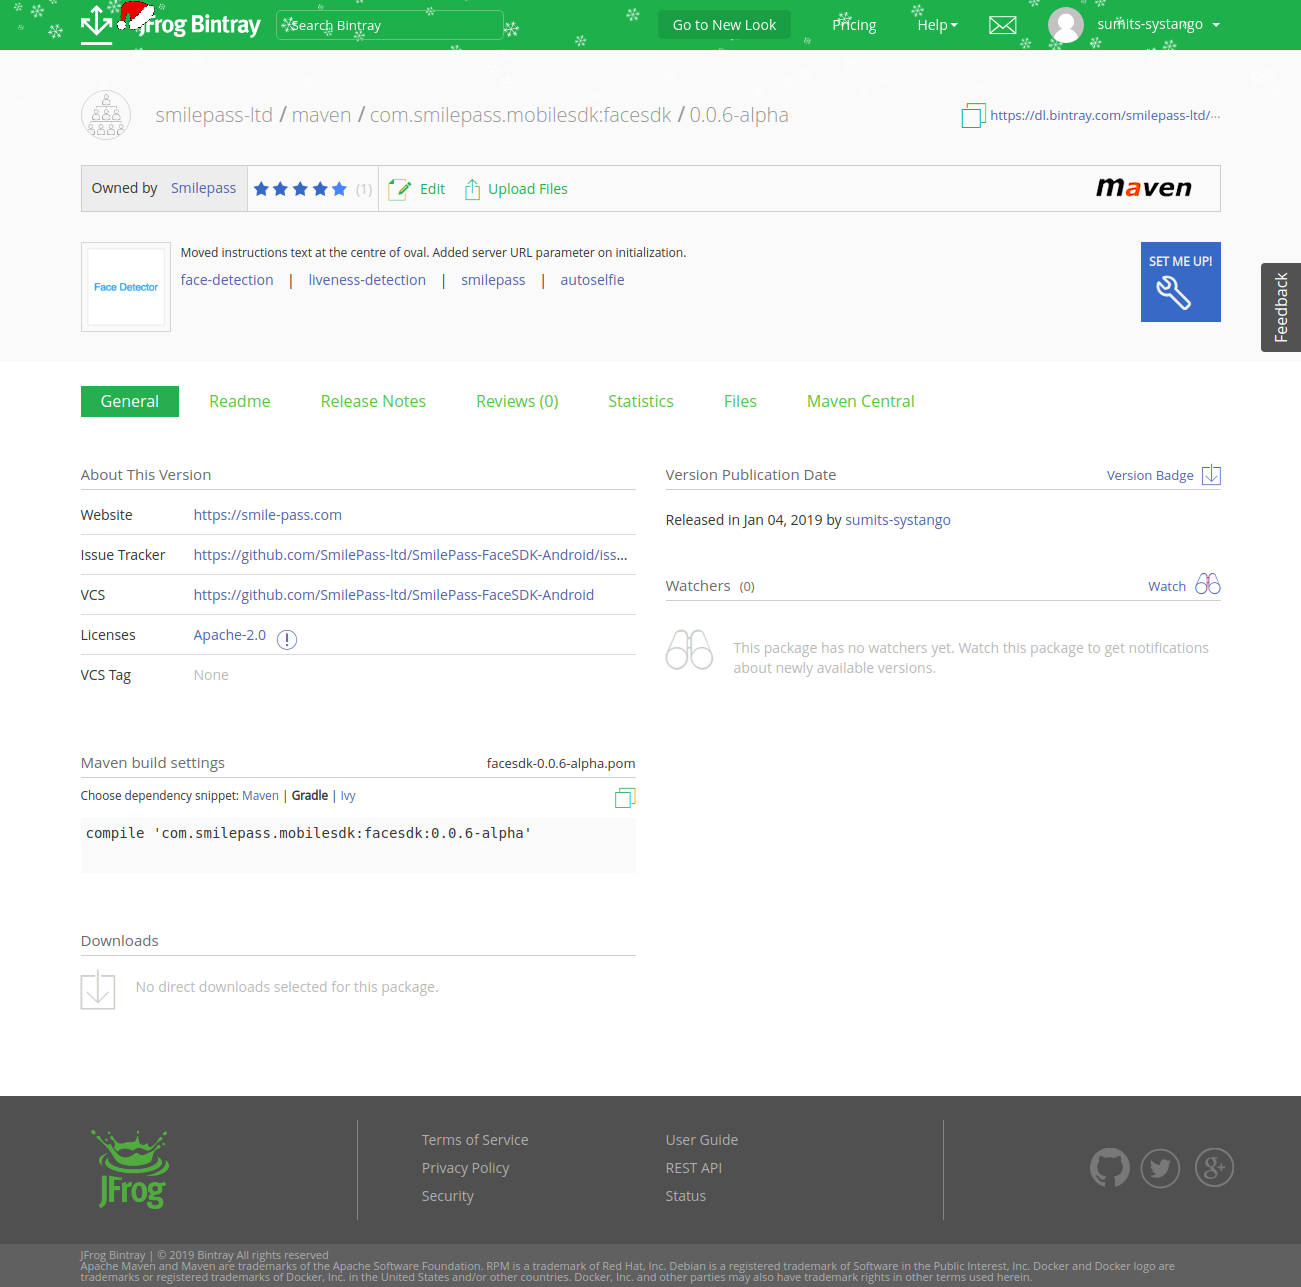
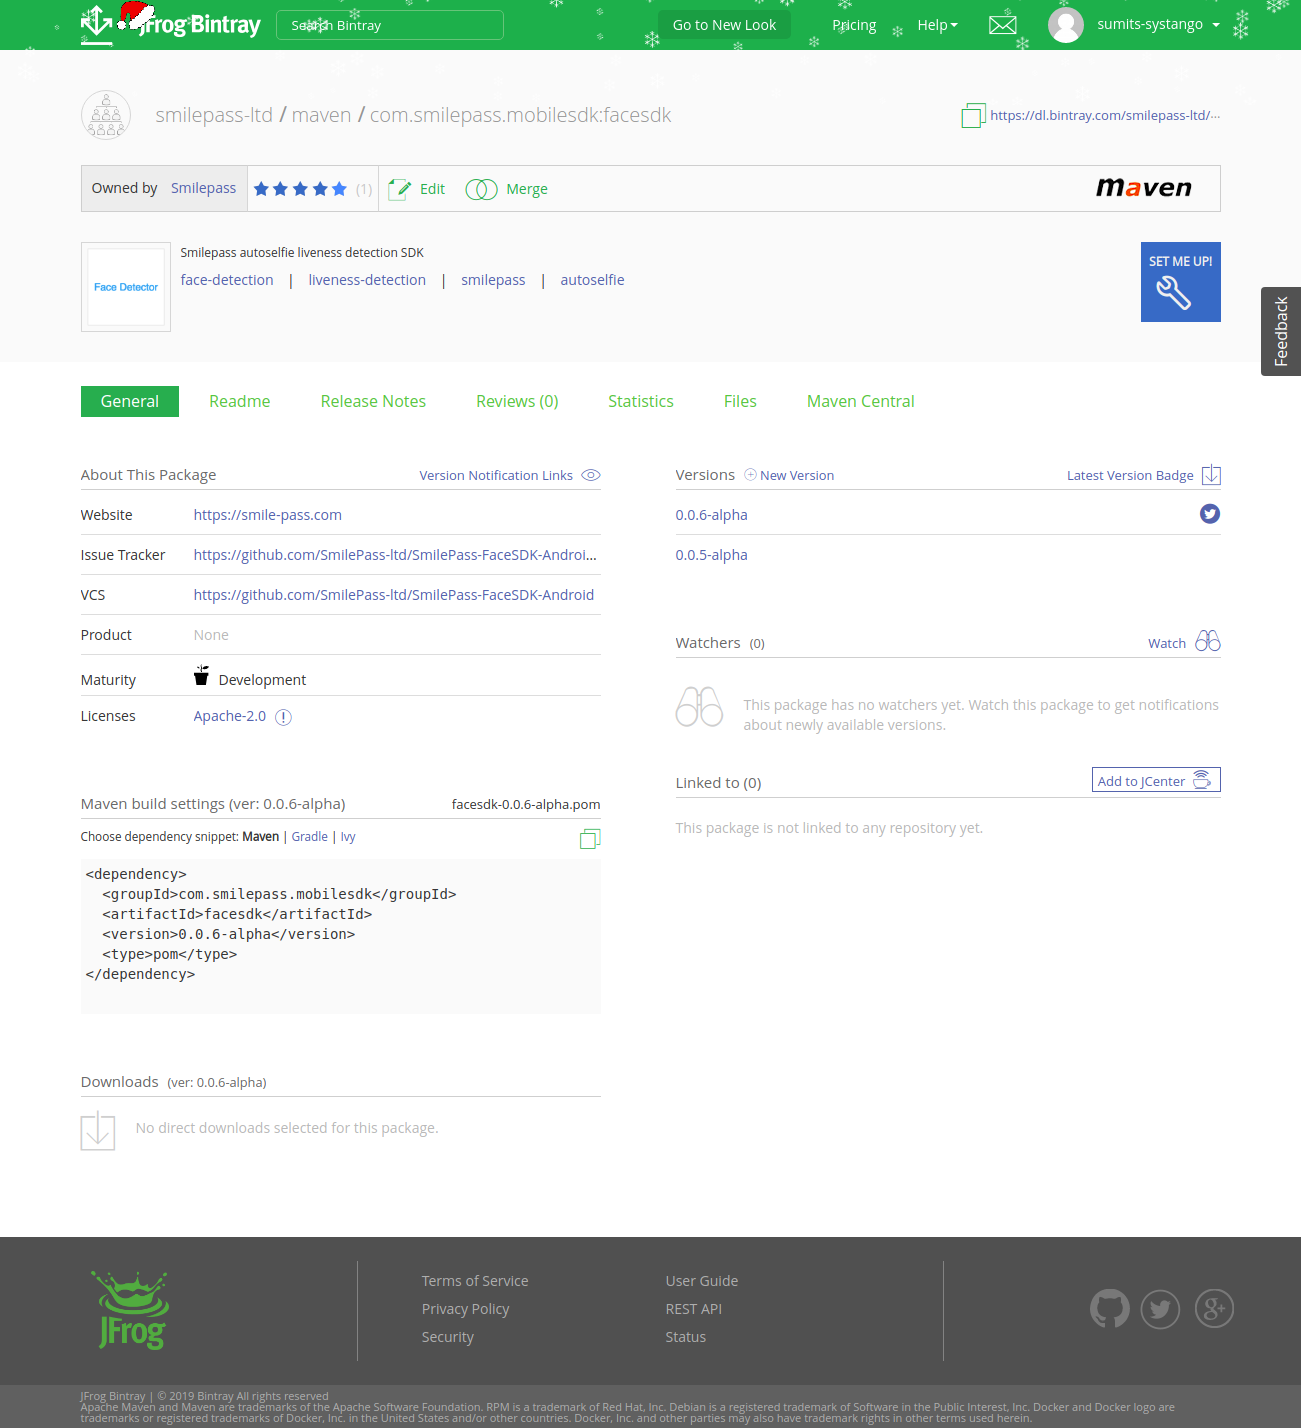
Fill the version name i.e. 1.0.0 and its description and click on “Create Version”. After creating a version, you will be redirected to the package details page. Now go to the version page. You will see the following page with empty details on “Maven build settings”, as your library is not published yet.
Get API Key
API Key is used for the authentication to upload your AAR file to the Bintray. Go to the Bintray dashboard and click on your name at top-right corner. You will see the following drop-down with profile related options-
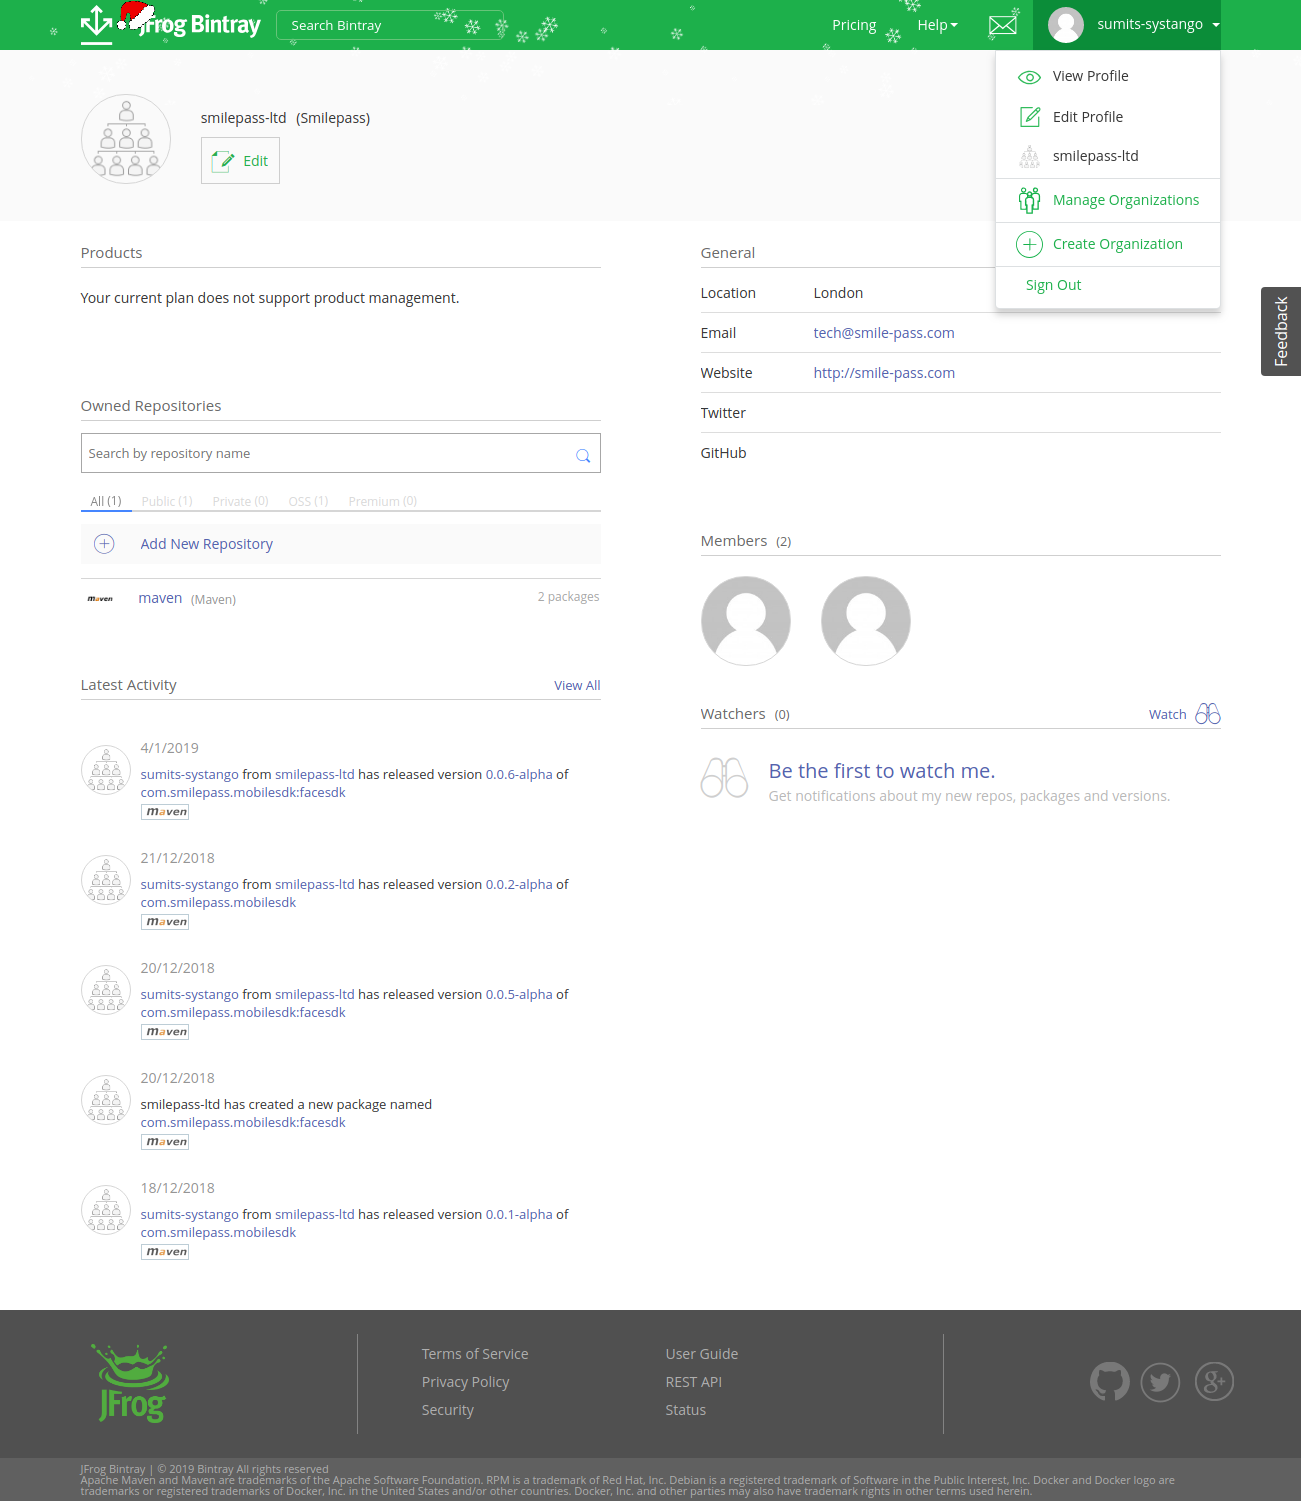
Click on the “Manage Organizations” which will redirect you to the following edit profile page-
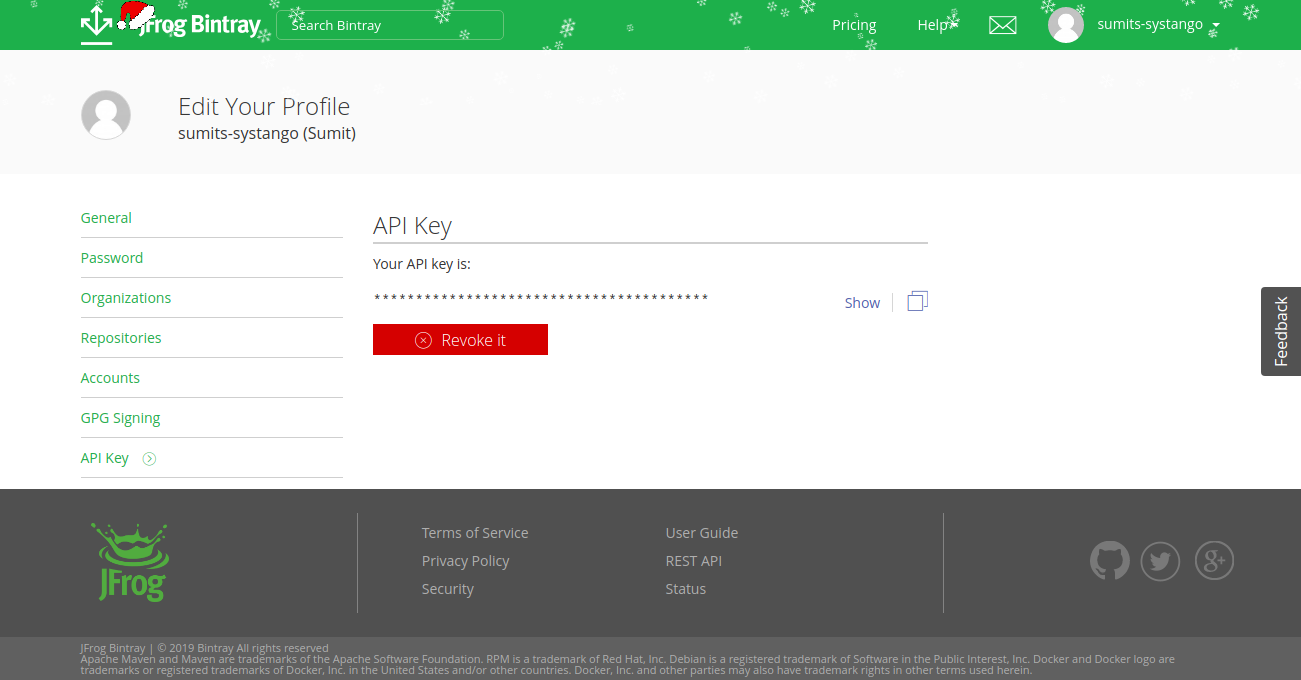
Click on the last option “API Key” from the left panel. Copy the API Key and keep it with you. You will need it while uploading the library.
We are done with the setup of Bintray. Now it’s time to configure Bintray on library code in Android Studio.
Configure Bintray in the Module
After the setup of Bintray package and version, you need to configure your library in Android Studio.
First, add following plugins in root level build.gradle file in dependencies section-
classpath 'com.jfrog.bintray.gradle:gradle-bintray-plugin:1.8.0'

classpath 'com.github.dcendents:android-maven-gradle-plugin:2.1'
Next step is to configure library details i.e. group id, artifact id, license etc. You also need to add Bintray credentials, package and version details. Add the following details to your library’s build.gradle file-
apply plugin: 'com.android.library'

apply plugin: 'com.github.dcendents.android-maven'

apply plugin: 'com.jfrog.bintray'
ext {

bintrayRepo = 'maven' // Name of the Bintray repo you created

bintrayName = 'com.smilepass.mobilesdk' // Bintray package name

publishedGroupId = 'com.smilepass.mobilesdk' // Group ID of the SDK which will be added in         implementation line of gradle

artifact = 'smilepass' // Artifact ID of the SDK which will be added in implementation line of gradle

libraryVersion = '1.0.0' // Version of the library you created in Bintray

libraryName = 'SmilePass' // It is generally the module name

libraryDescription = 'SmilePass biometric face verification SDK' // Small description of the library

siteUrl = 'https://github.com/SmilePass-ltd/SmilePass-SDK-Android'

gitUrl = 'https://github.com/SmilePass-ltd/SmilePass-SDK-Android.git'
developerId = 'smilepassltd'

developerName = 'SmilePass Ltd.'

developerEmail = 'info@smile-pass.com'
licenseName = 'The Apache Software License, Version 2.0'

licenseUrl = 'http://www.apache.org/licenses/LICENSE-2.0.txt'

allLicenses = ["Apache-2.0"]
//Bintray Credentials

bintrayUsername = System.getenv("bintrayUsername") // Your Bintray username

bintrayApiKey = System.getenv("bintrayApiKey") // API Key you copied in previous step

bintrayUserOrg = System.getenv("bintrayUserOrg") // Organization you created in Bintray

}
android {

...

}
dependencies {

implementation fileTree(dir: 'libs', include: ['*.jar'])

...

}
apply from: 'bintray.script'
You can see the comments in ext{…} section for the explanation of those variables clearly.
Look at the credentials part, I prefer saving credentials in the environment variable as saving credentials in the code is not secure. Alternatively, you can add credentials in local.properties file also.
Now you can see the last line of the gradle file above. Here you need to apply path of Bintray script which will upload library files to the Bintray. You can download this script from here and copy on the module’s directory.
Compile the Library Module
After all configuration and credentials setup, it’s time to generate the AAR and other files. Open a terminal, go to your project’s root directory and run following command-
gradlew install
If you see any javadoc related error, there is a small workaround for it (If you find any other solution for it, please share in comment). Add following line in root level build.gradle-
subprojects {

tasks.withType(Javadoc).all { enabled = false }

}
After that, run the install command again. The build generation process will be started and you will see following message on the success-
BUILD SUCCESSFUL in 46s
27 actionable tasks: 17 executed, 10 up-to-date
Uploading Library to Bintray
After a successful build, it’s time to upload your library to Bintray. We can do it by running following command in the same terminal-
gradlew bintrayUpload
After successful upload, you will see a similar BUILD SUCCESSFUL like message as mentioned above.
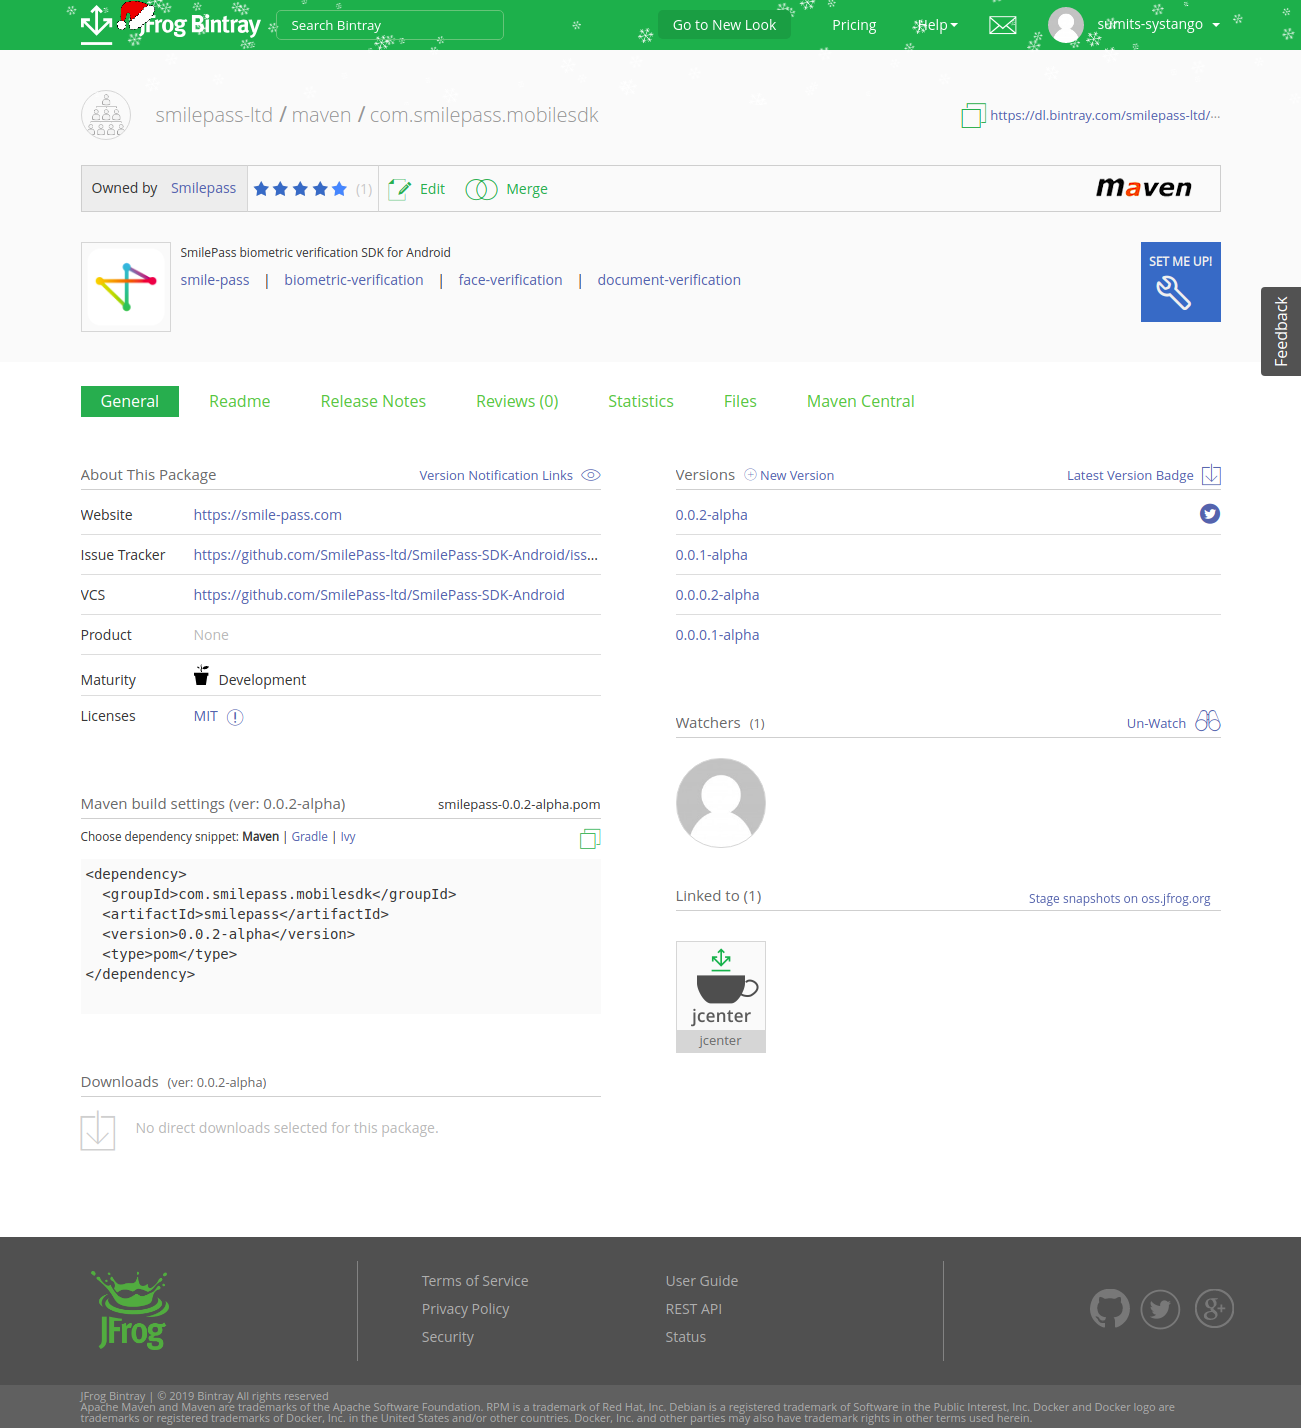
Now go to the version page on Bintray and you will see your library details i.e. maven and gradle dependency settings there.
Add Library to jCenter
If you add a gradle dependency that you just created in any other project, you will get an error like “failed to resolve com.yourlibraryname…”. It’s because your package is added to Bintray repo only, not in jCenter yet.
To add the package in jCenter, click on the “Add to jCenter” button as shown in the bottom-right in below image-
You will be redirected to a form which will require small detail about your package. Write a brief about your library and submit the request. After submission, jCenter team reviews and approves the package which takes around 2-3 hours to 2-3 days. When they approve, you will get a notification on Bintray. Add to jCenter button will not be there and you will see following jCenter badge-
If your package is not added to the jCenter and still you want to integrate your library, you can do it by explicitly specifying your repository URL. For that, click on the blue “SET ME UP!” button and then click on “Resolving artifacts using Gradle” as shown below-
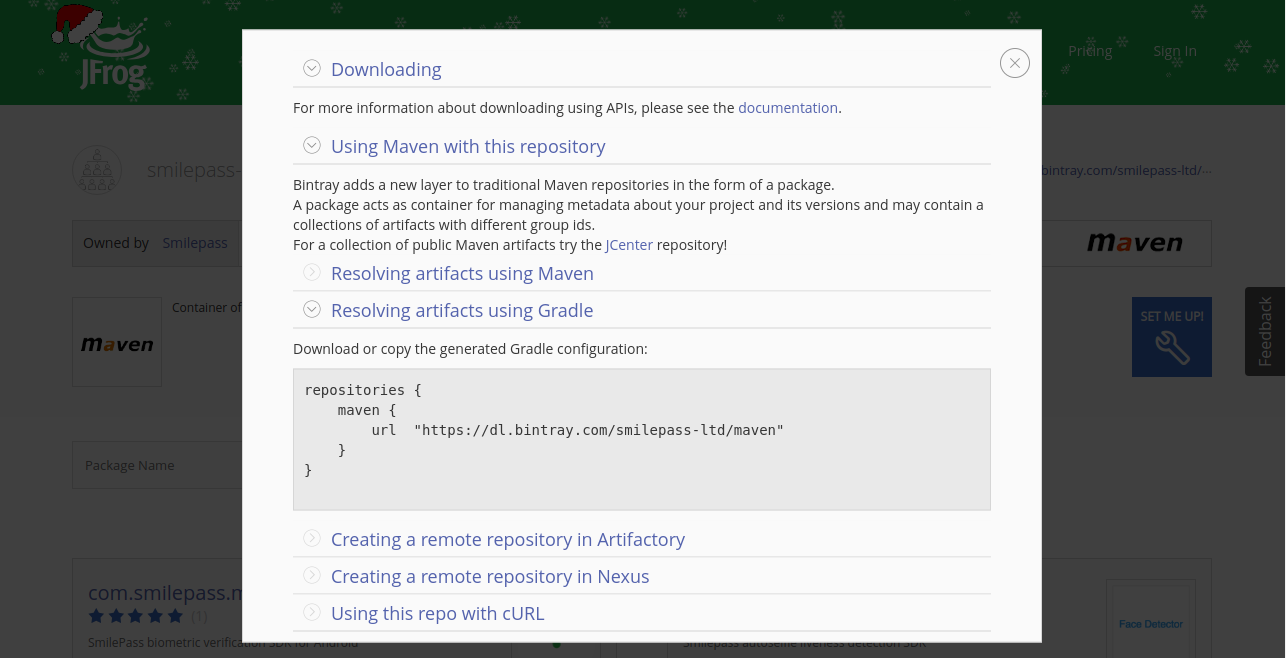
Copy this maven URL and add in repositories section.
Congratulations! Your library is ready to use.
Tutorials & Samples
You are ready with gradle dependency and you have tested it. It’s time to show your work to the world. How will you inform developers all around the world about your beautiful Android library?
The most simple and convenient way is, create a public GitHub repository and add a sample application which demonstrates the use and features of your library.
It’s not just about informing, developers will expect a well-structured introduction, integration guide, tutorials, and troubleshooting tips.
What are the best practices to provide integration guide and SDK tutorials? Is it good to provide sample application or sample code? What problems may occur on integrating your SDK in any app and how to provide troubleshooting and resolution steps?
We have added the introduction of library and basic integration guide in the README.md file. Apart from this, it’s good practice to add tutorial and troubleshooting documents in wiki pages. We have added some wiki pages as shown in below image-
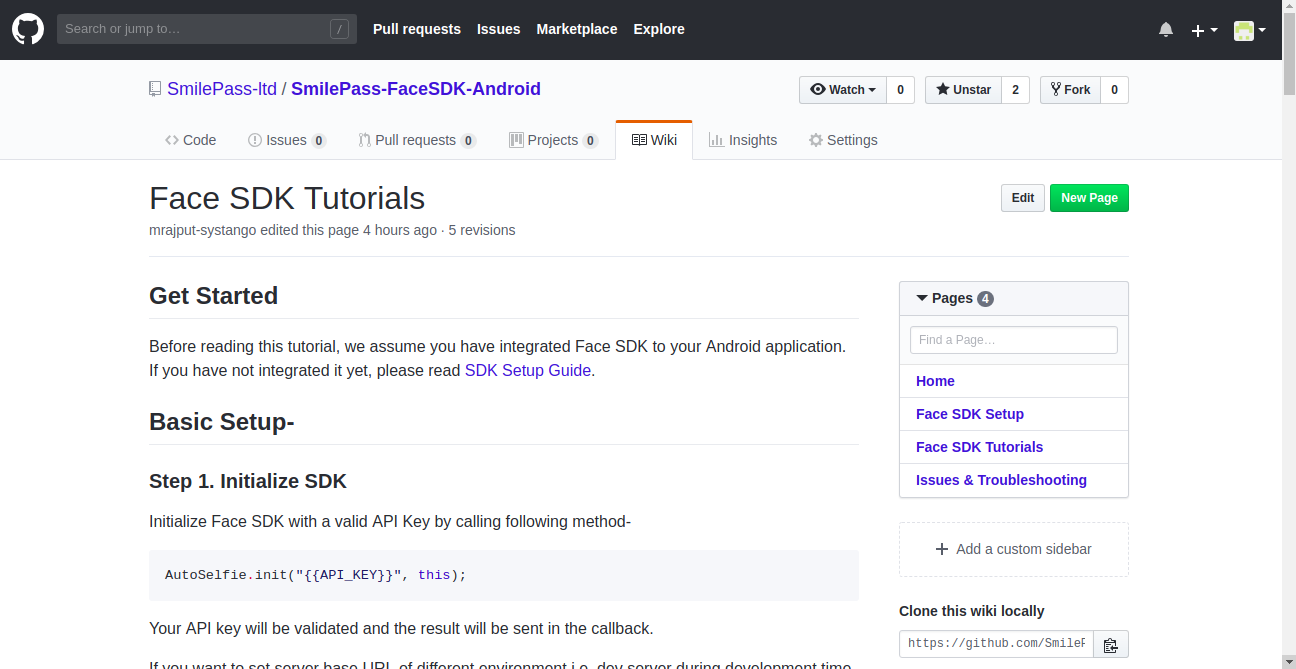
You can check full documentation on SmilePass FaceSDK Sample.
Conclusion
After performing all these steps, you will be able to successfully distribute your Android library to the developers. Although it looks a very lengthy and complicated process, the steps are quite straightforward. For example, most of the steps of setup and configurations related to publishing the SDK are one time. It will require little effort from the next time.
Developing the library is a great idea for both, your in-house projects or public libraries. You can use the add the module in any project without rewriting or copy-paste the same code again and again in different projects. Gradle makes it easy to integrate the library in just a few lines. You can scale the code easily and upgrade as per your need.
Hope you get complete clarity there and wish to see your awesome library! Cheers. ?
Loved what you read? Why not join our webinar where Systango’s Android specialists explain how to develop an Android library project, obfuscate the SDK and publish SDK to JCenter.
Join us on 16th January, 2019 at 8:00 PM (Indian Time). You can get started with the webinar anytime here!


This is the best article i have come across regarding publishing android libraries. However, i think one point has been left out .i.e. how do we include dependencies present in our library while publishing the app?
Thanks for sharing this.